Since I made the switch to reusable menstrual products several years ago, I’ve only bought a few pieces of cloth pads. A few were gifted to me too but I made most of my stash myself. Now, my sister actually gave me her sewing machine but I haven’t quite mastered it enough to attempt making pads with it so I have resorted to sewing them by hand for now. I never thought my home economics classes back in St. Theresa’s College would ever come in this handy.
My primary reason for making the switch was based on my desire to reduce plastic waste. Now that I’ve used them for about 5 years now, I can honestly say they are the superior option even just based on comfort and cost. In the last 5 years, I’ve only had to use disposables once and that was because I had forgotten to bring my reusables with me the day my period decided to show up. Ugh! It was so uncomfortable. Never again. One of the best things about pads is that they are customizeable. You can choose your own pattern, dimensions, shape, and materials so they’ll perform exactly the way you want them to.
Now that I’m already 32 weeks pregnant, I’m anticipating the need for a lot of heavy absorbency pads for the post-partum period. And I REALLY don’t want to have to wear disposable adult diapers or pads for the weeks that I’ll still be bleeding. Since a lot of my cloth pads are looking a little worn out already from years of use, I decided I wanted a fresh new set. So I took out my sewing kit and got to work.
Then I realized that maybe there are other women out there that would love to learn how to do this themselves as well. If that sounds like you, then here is a step-by-step guide to making cloth pads by hand:
(If you know how to use a sewing machine, use it and save a ton of time.)
What you’ll need…
(Links to reliable local suppliers for these materials at bottom of the page)
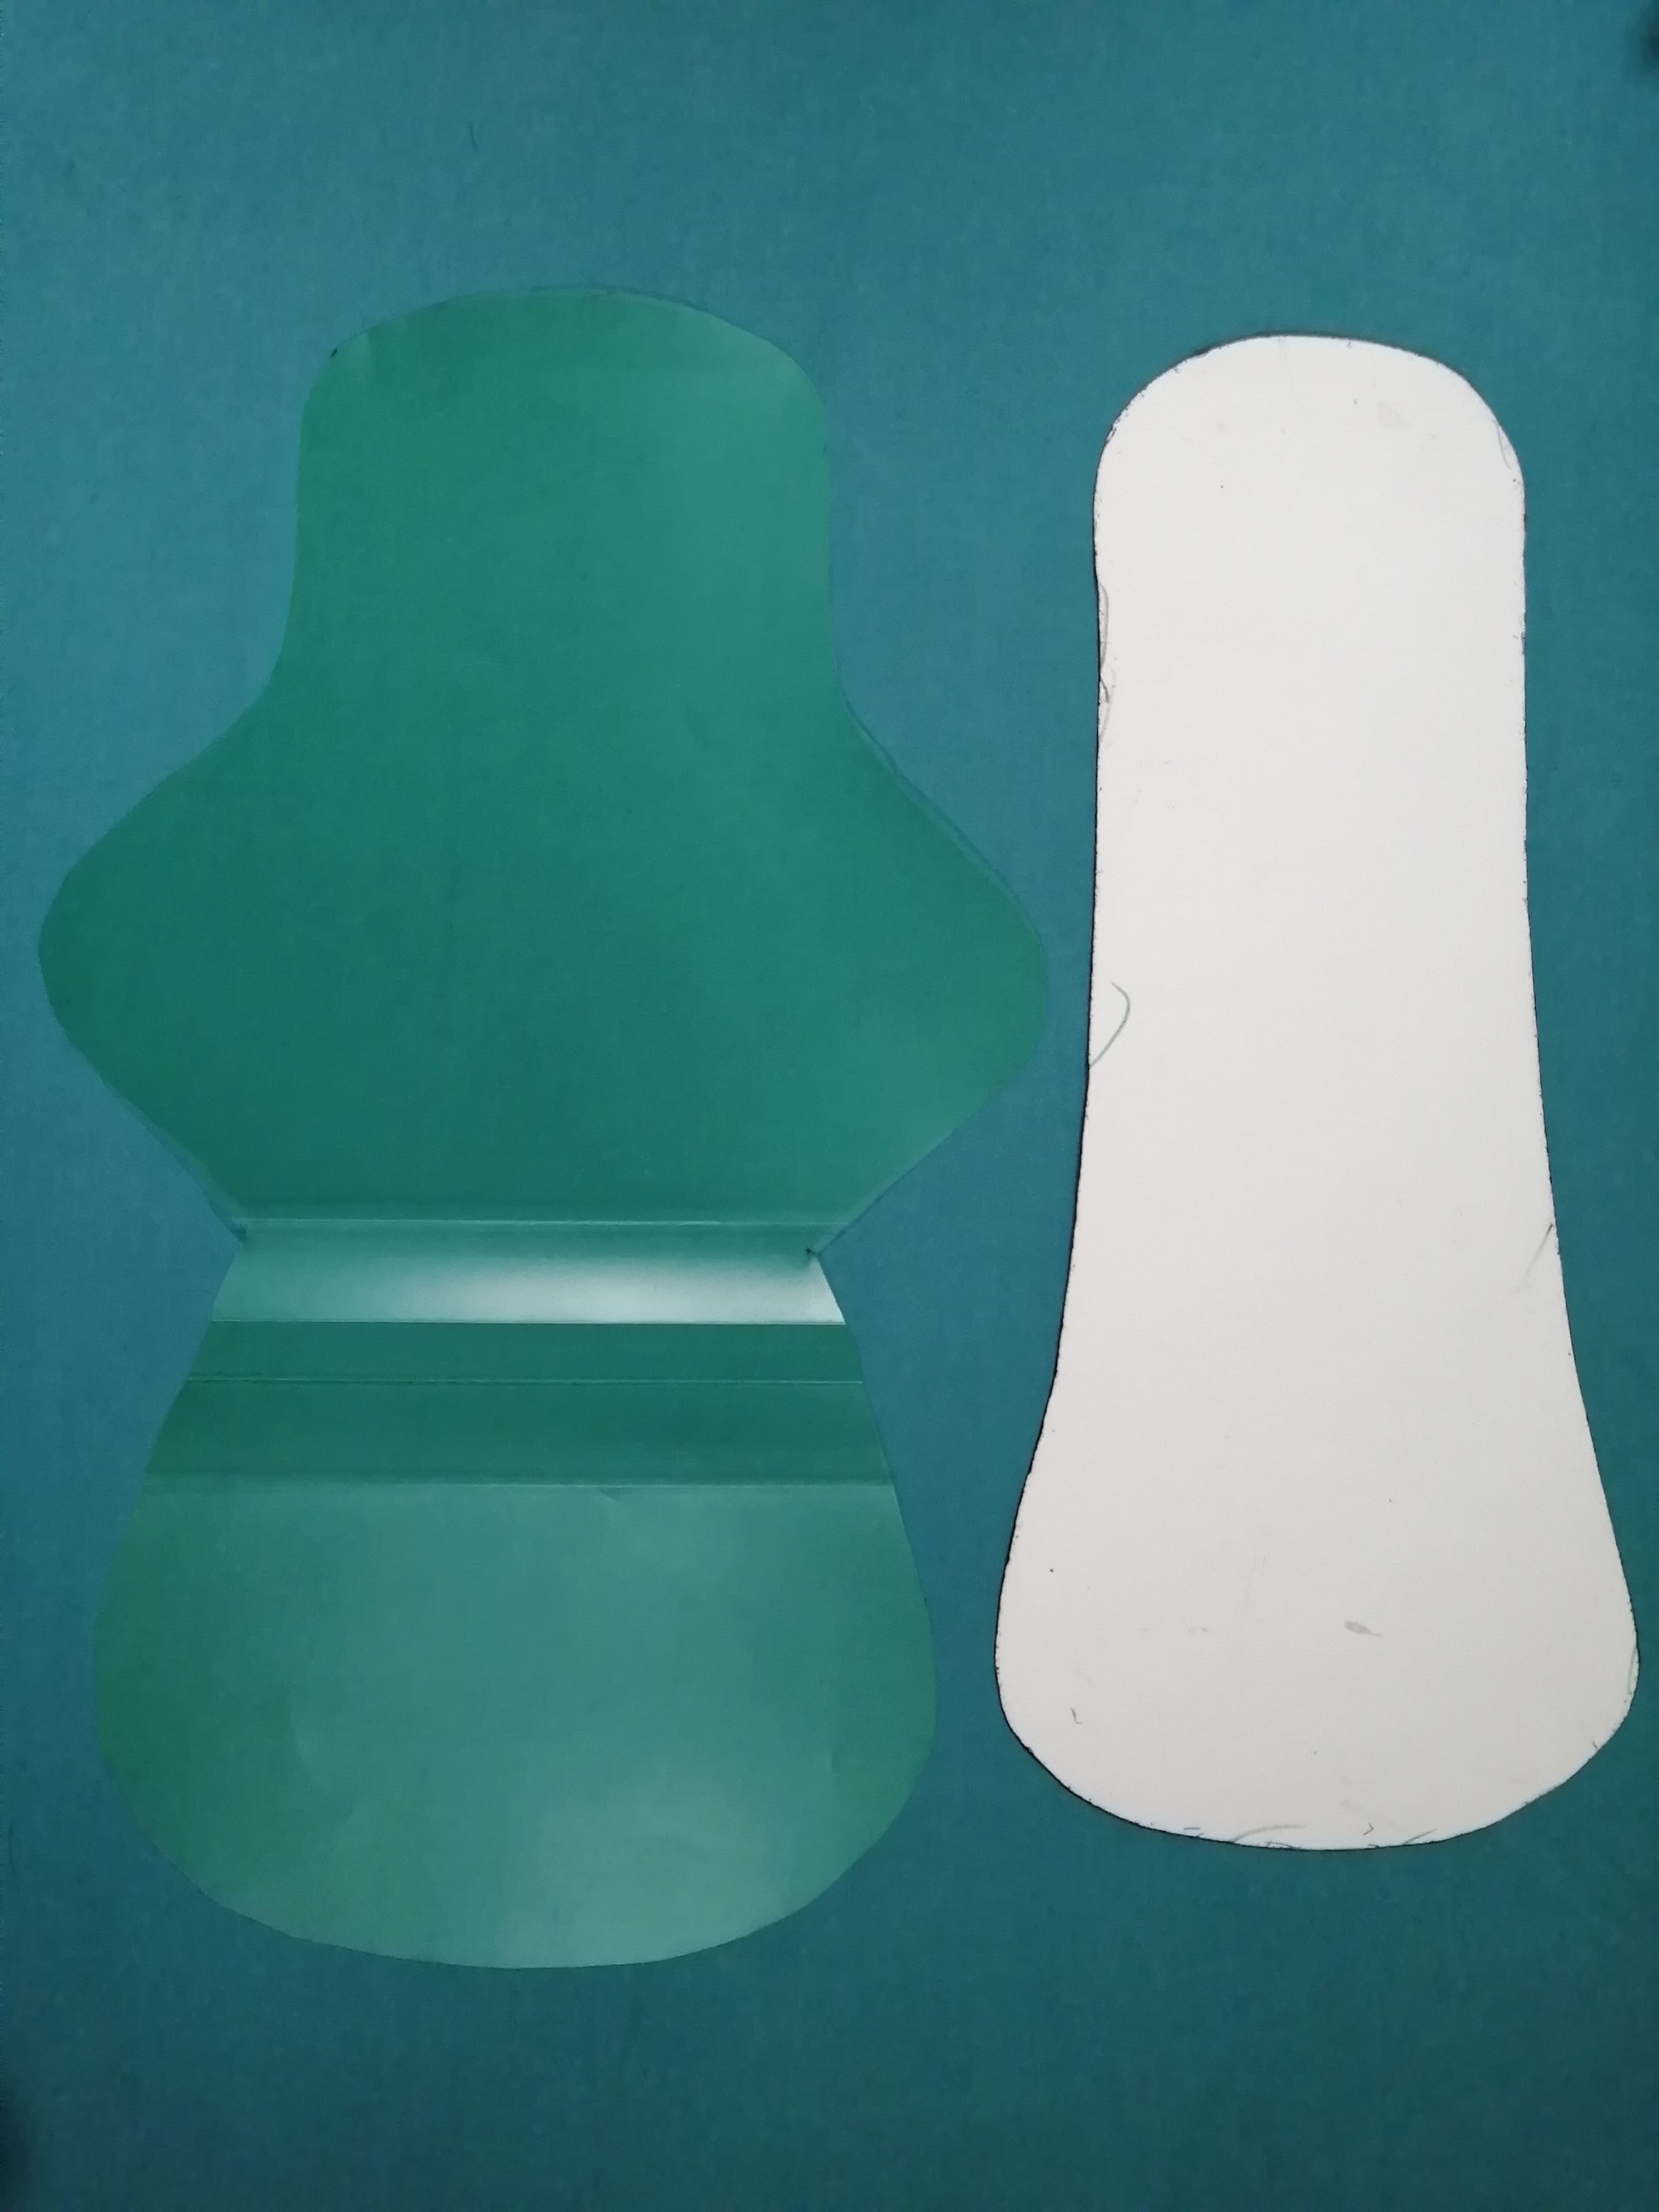
Fabric

From L-R: AWJ topper, PUL, Cotton backer
- Topper
- This is the top most layer that first absorbs the blood/discharge. You’ll want to use a material that doesn’t stain easily and that wicks moisture away from your skin for a stay-dry feeling. I use athletic wicking jersey (AWJ) for those reasons. Others use cotton (which stains easily), flannel (obvious wear and tear and also stains easily), minky (which I have never used but I’ve heard it’s not recommended in tropical climate because it can feel warm), and bamboo charcoal (which is highly absorbent and also wicks moisture from the skin effectively but more difficult to find).
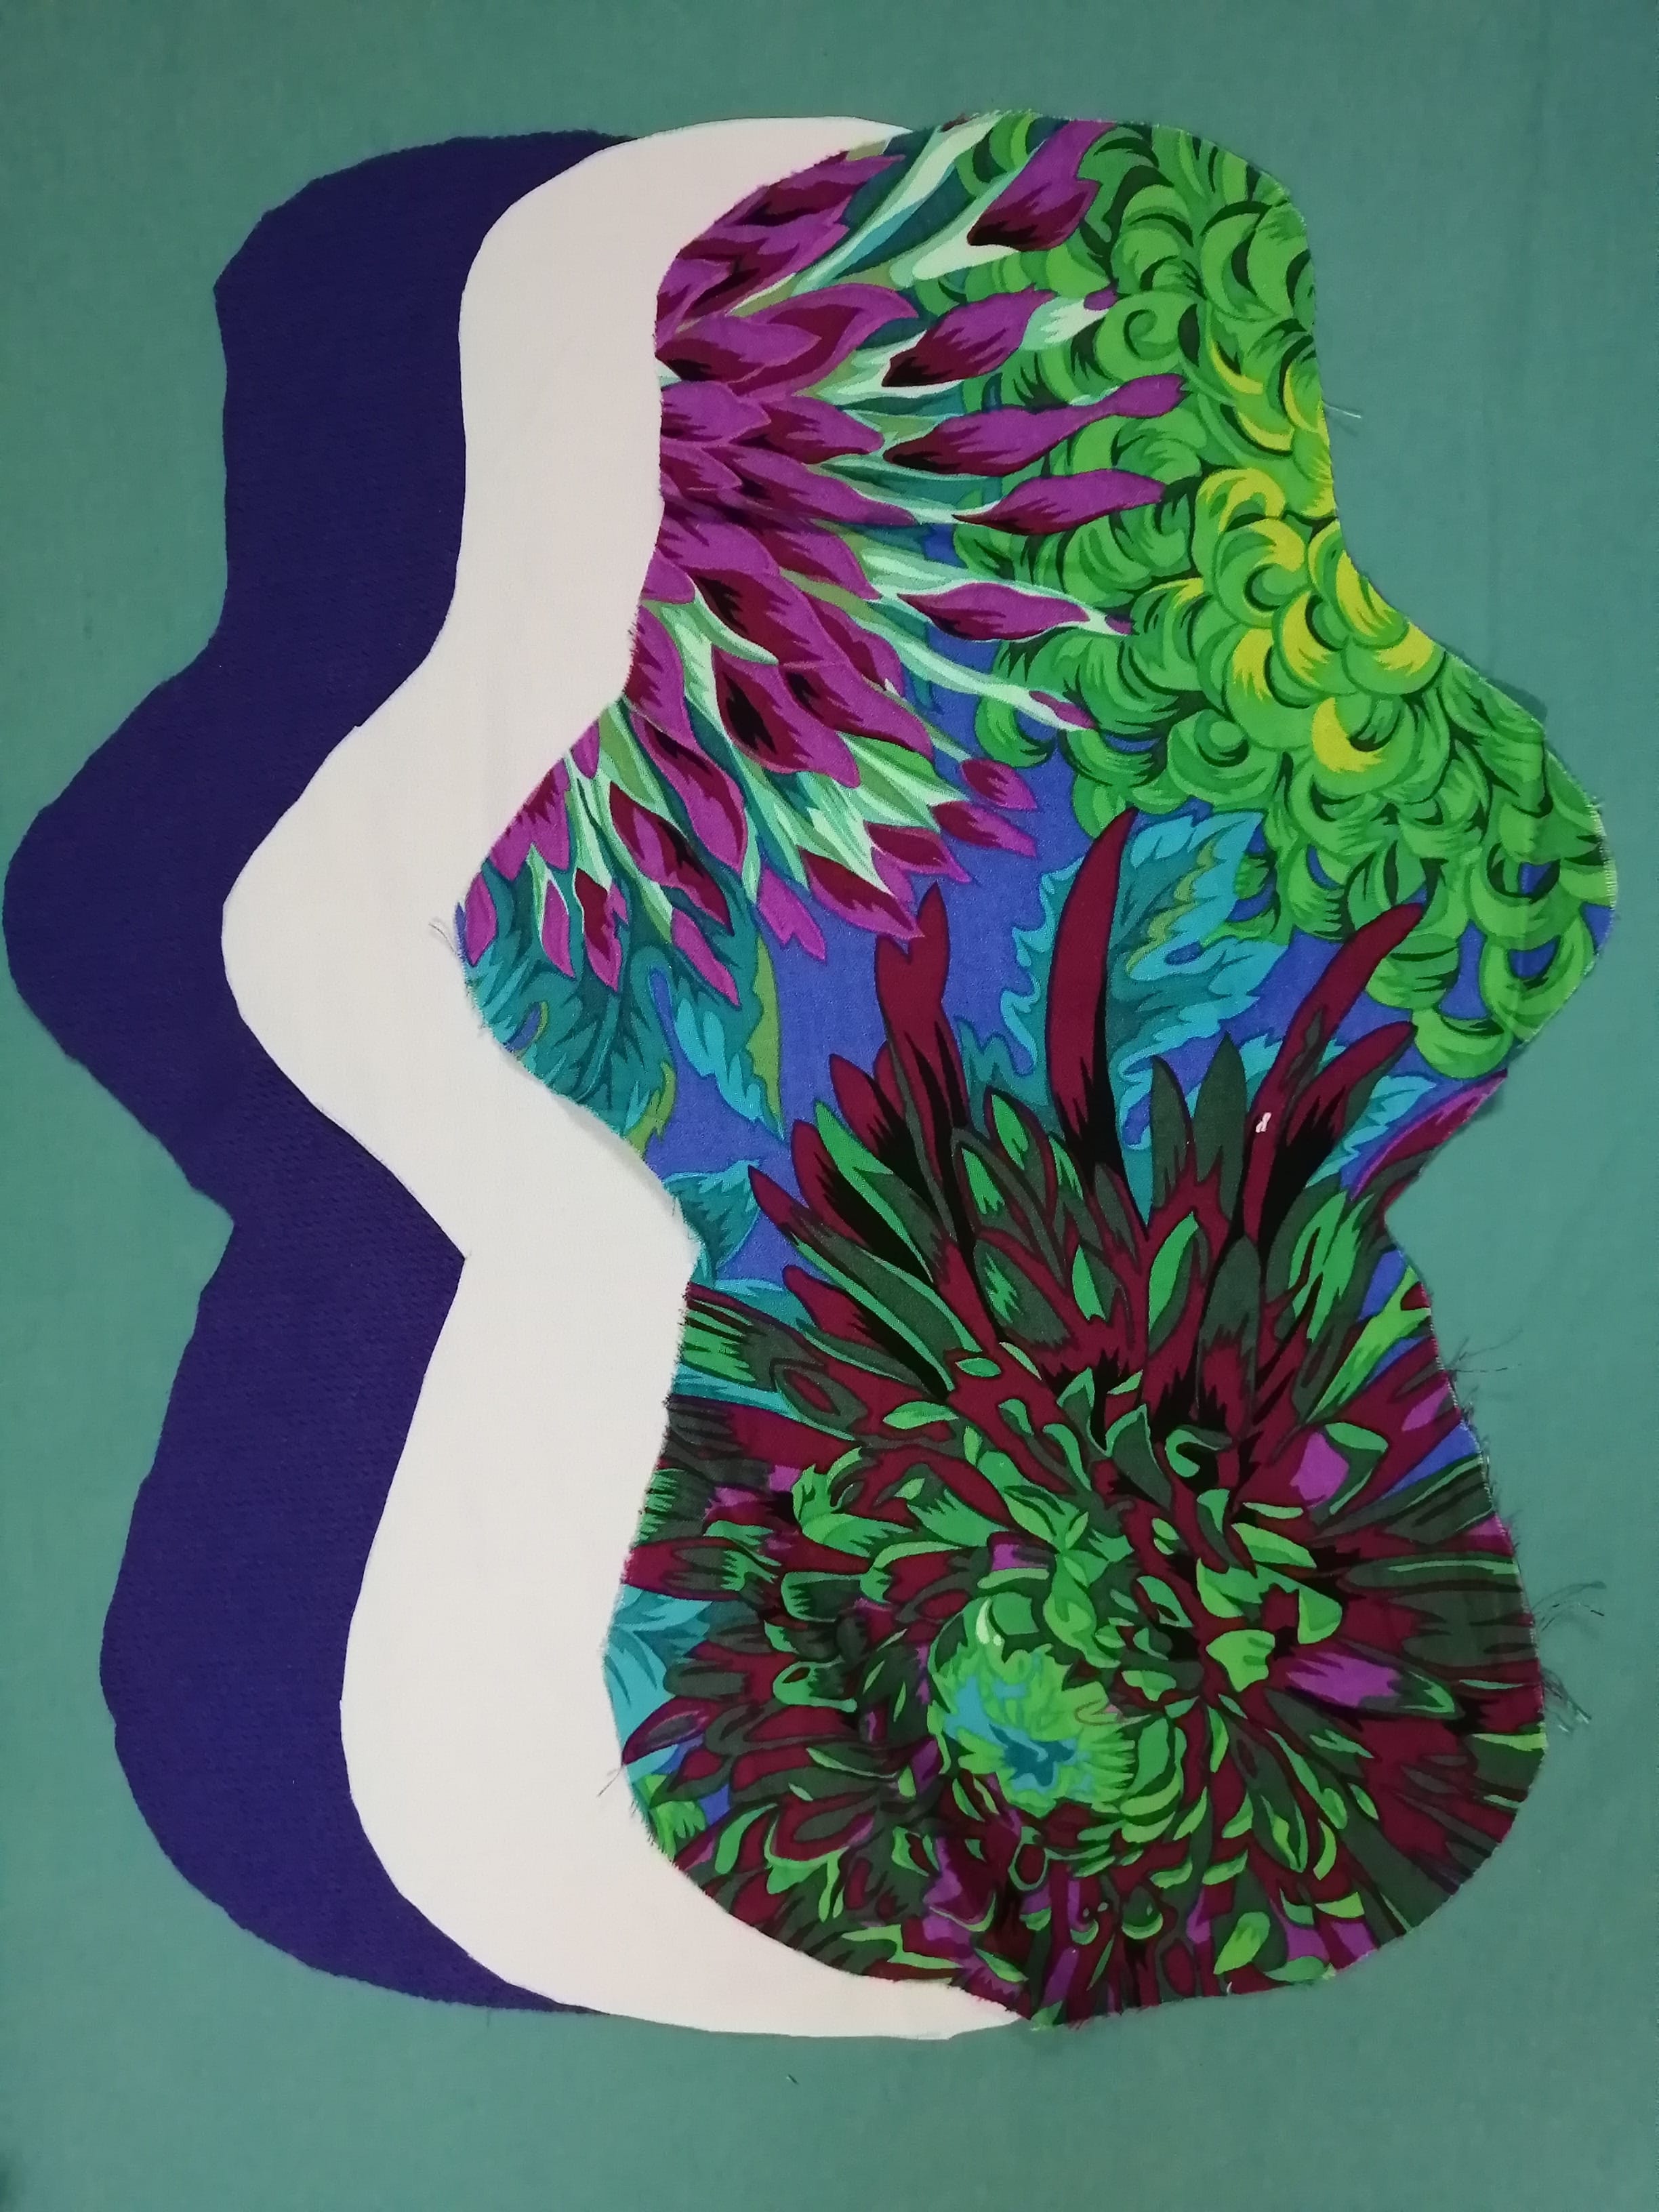
- Soakers
- This is composed of one or more layers of absorbent fabric that will draw the blood away from the topper. Some use only one type of fabric while others use a mixture. There are a LOOOOT of options for this. I have tried using fabric from those cheap good-morning-towels, which can get bulky and are difficult to sew. Some makers use flannel but you’ll need several layers because they don’t hold very much fluid. I personally use old flour sacks for this. For my heavy pads, 4 layers are usually enough but I might add a couple more for post-partum purposes since I expect heavier bleeding then and I can’t use my menstrual cups yet. My mom swears by the absorbency of flour sacks since that’s what a lot of people used back then as cloth diapers. She was right.
- Waterproof layer
- I only use Polyurethane Laminate, which is a laminated layer of fabric that is thin and still quite breathable while being waterproof. You’ll notice that one side of this fabric is shiny and that would be the laminated side.
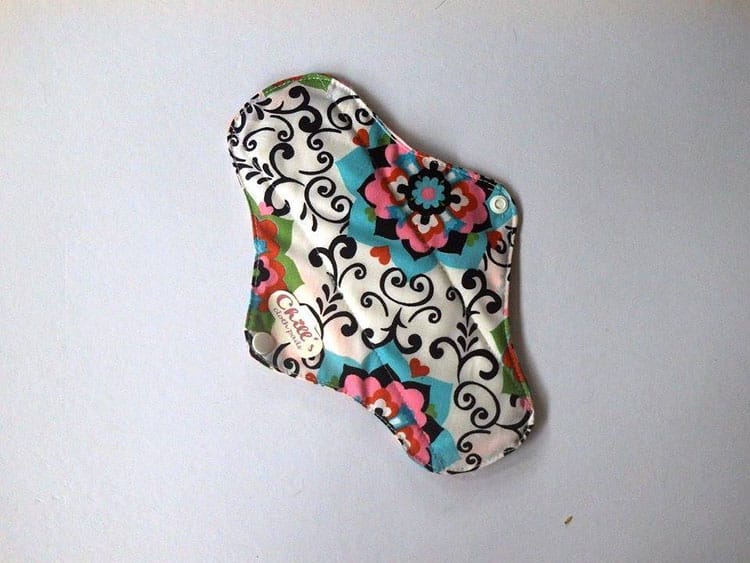
- Backer
- This is where you can have some fun with the print. You can pretty much use any fabric you want for this except for anything too smooth or shiny because then the pad will slide around in your underwear. I usually opt for woven cotton for my backers.
Thread
Having an assortment of colors comes in handy so you’ll know you have something that will match any fabric that you choose to go with.
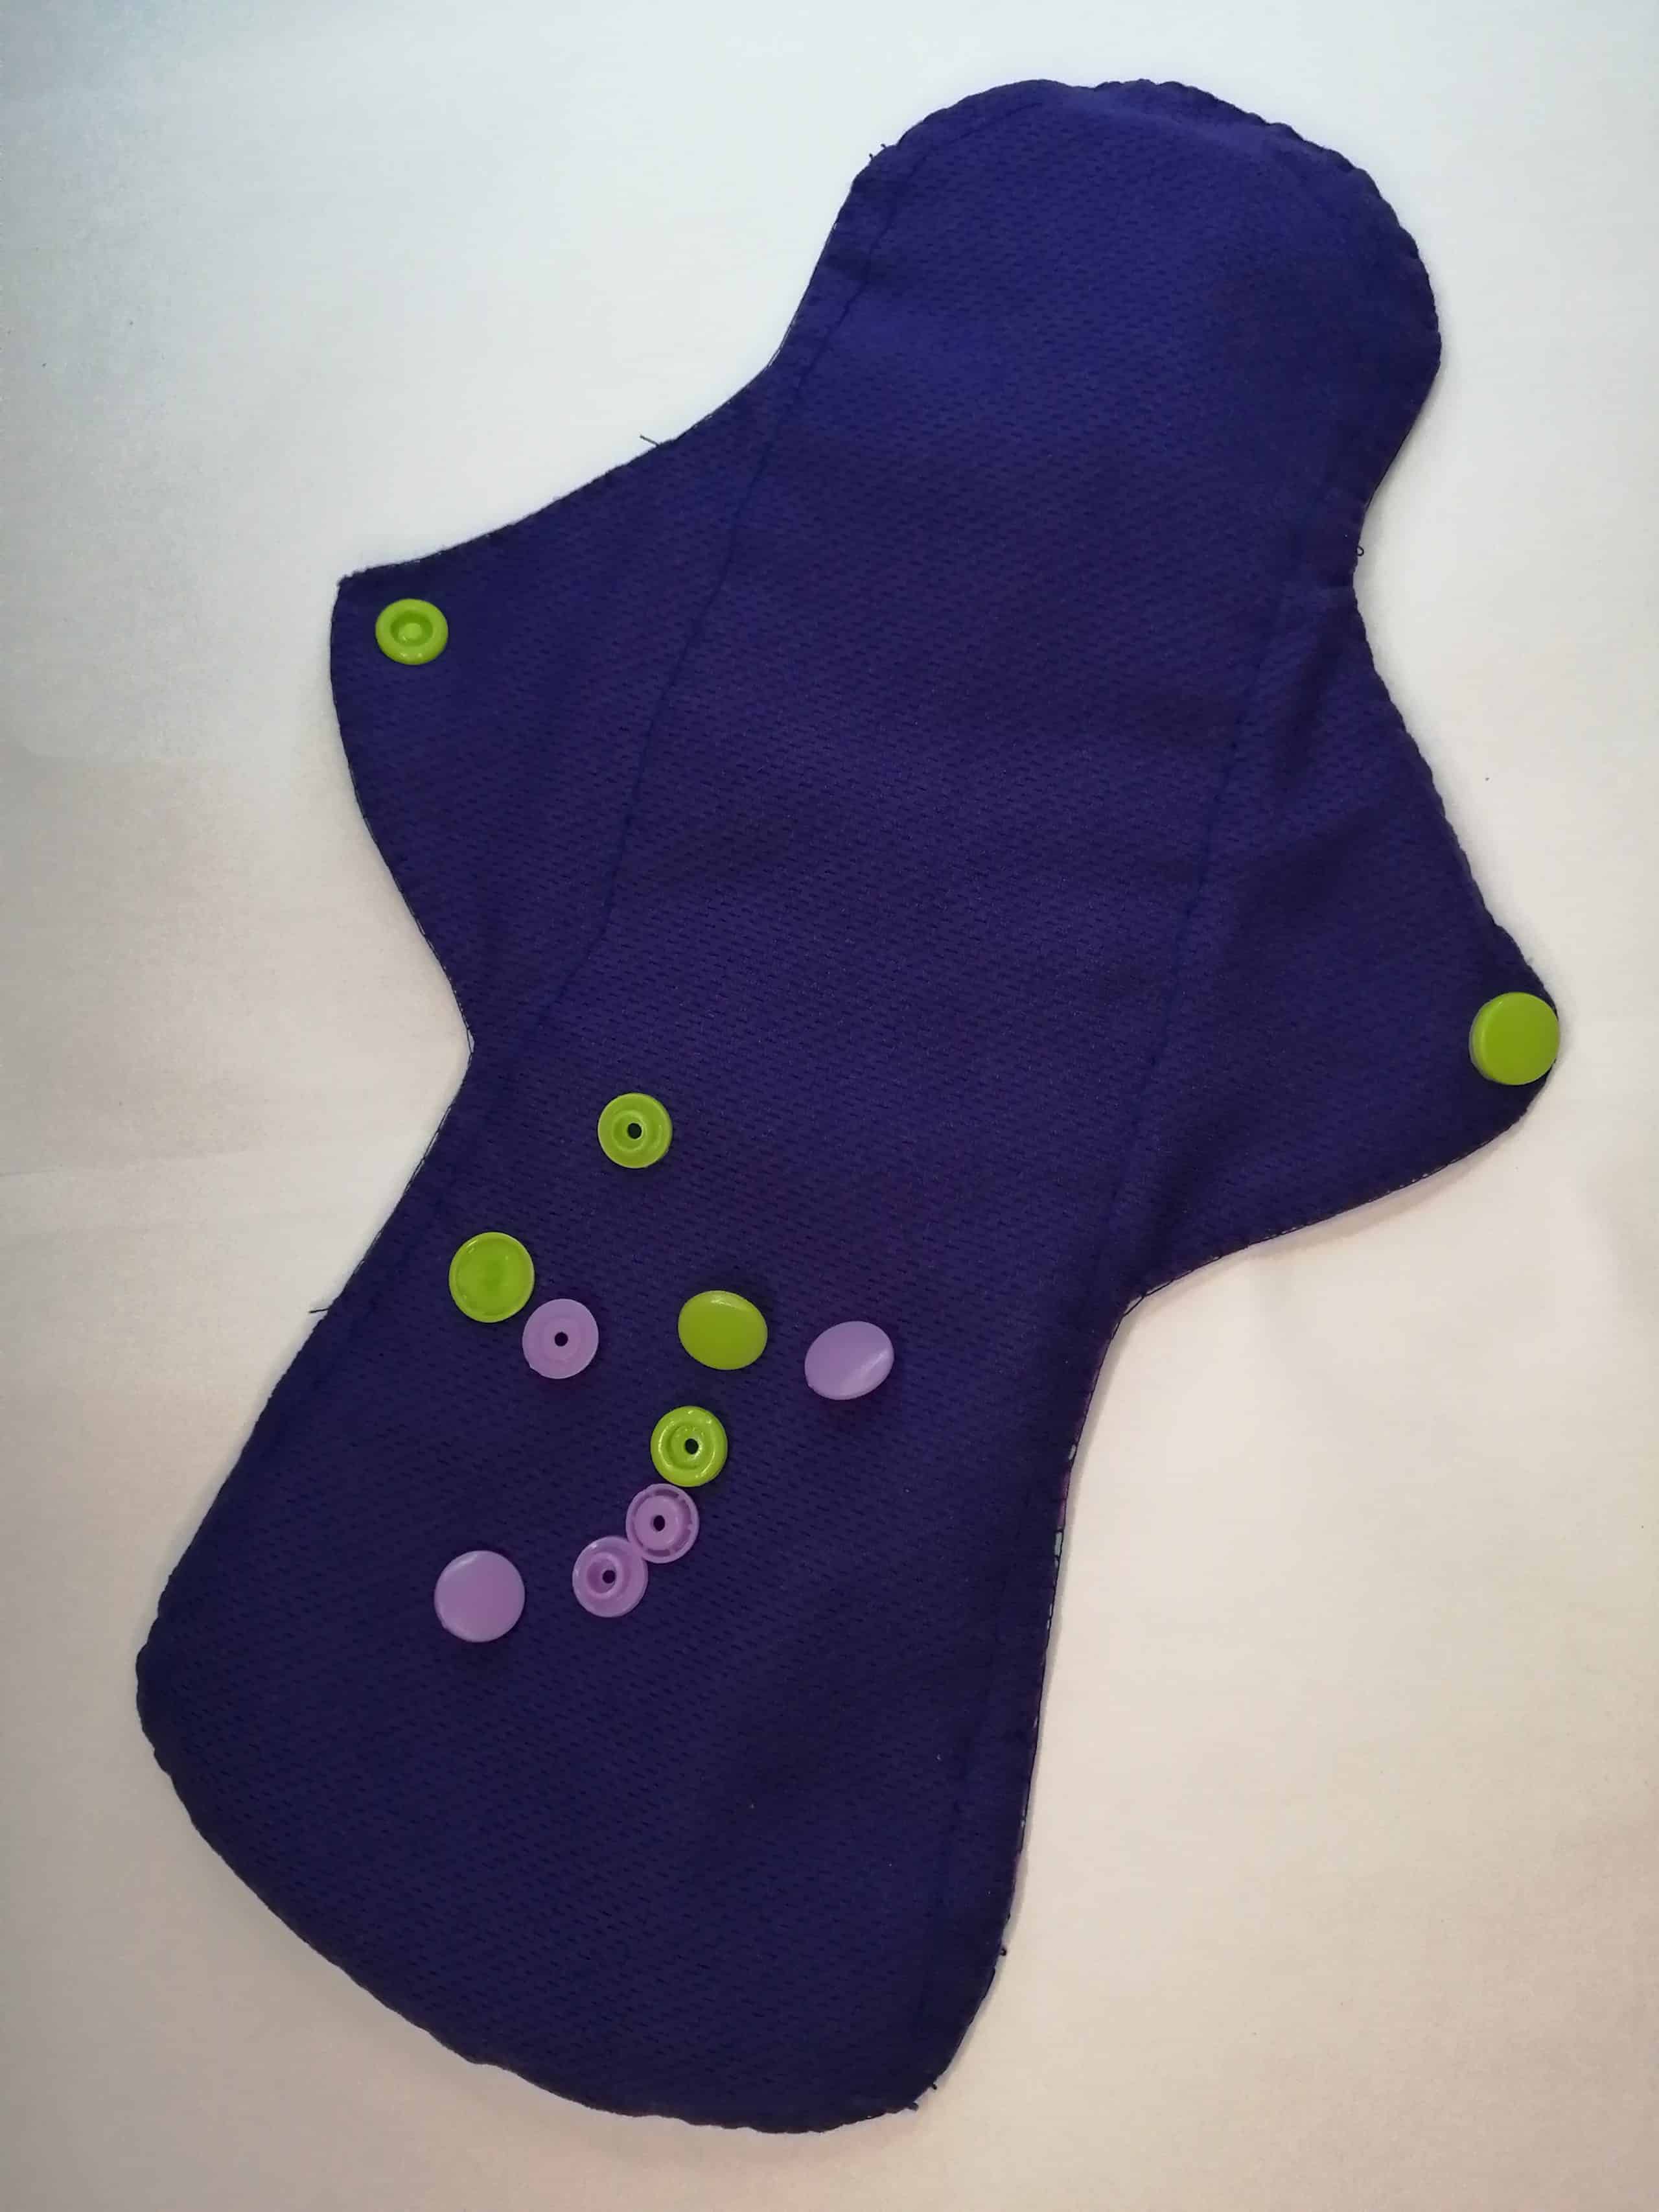
Closure Materials
- Snaps
- Snap pliers
- Hole puncher
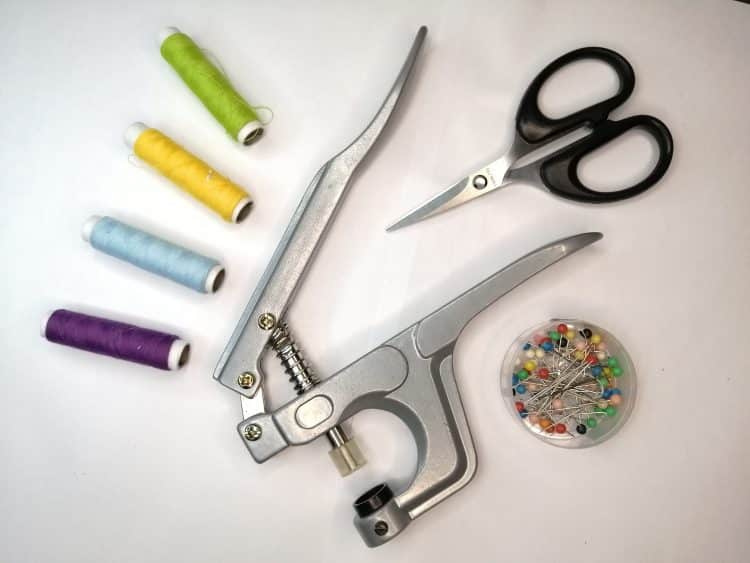
Of course if you don’t want to go out and buy snap pliers and snaps, you can always use buttons. For my earlier DIY pads, I used buttons to close them and they worked just fine.
Needle and Fabric Scissors
Use scissors that are not used for anything other than fabric. Trust me. This will make your life easier. I’ve bought a ton of other scissors for our home just so my son and husband won’t be tempted to use my fabric scissors for other things.
Instructions
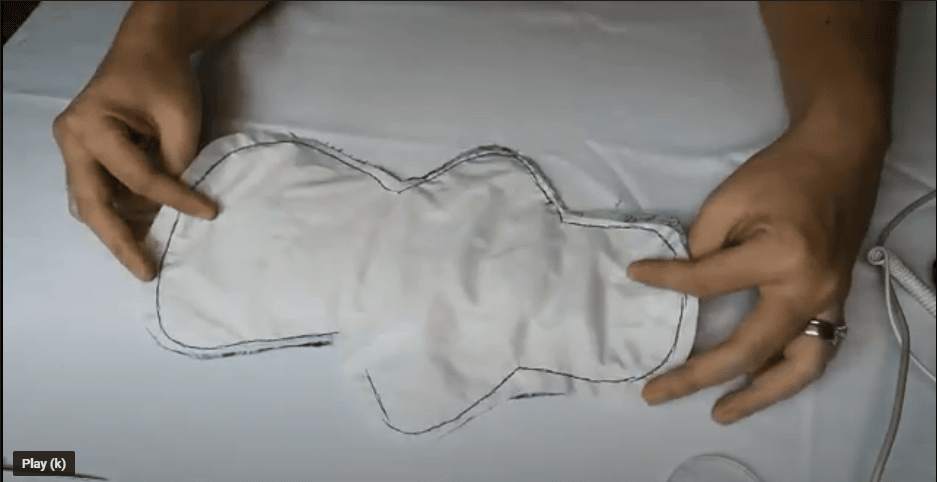
- Create/choose your desired pattern and trace it onto a piece of cardboard or plastic folder… Something that’s stiffer than regular paper so that you won’t have to worry about it tearing. I traced mine off of another pad that I have and just made a few tweaks to the dimensions. You’ll need one pattern for the soakers and another pattern for the topper, backer, and waterproof layer.
- Draw your patterns on your fabric of choice and cut them out with fabric scissors. You can have as many layers for your soakers as you want. For my post-partum pads, I’ll be going with 5 or even 6 layers just to have some extra absorbency.
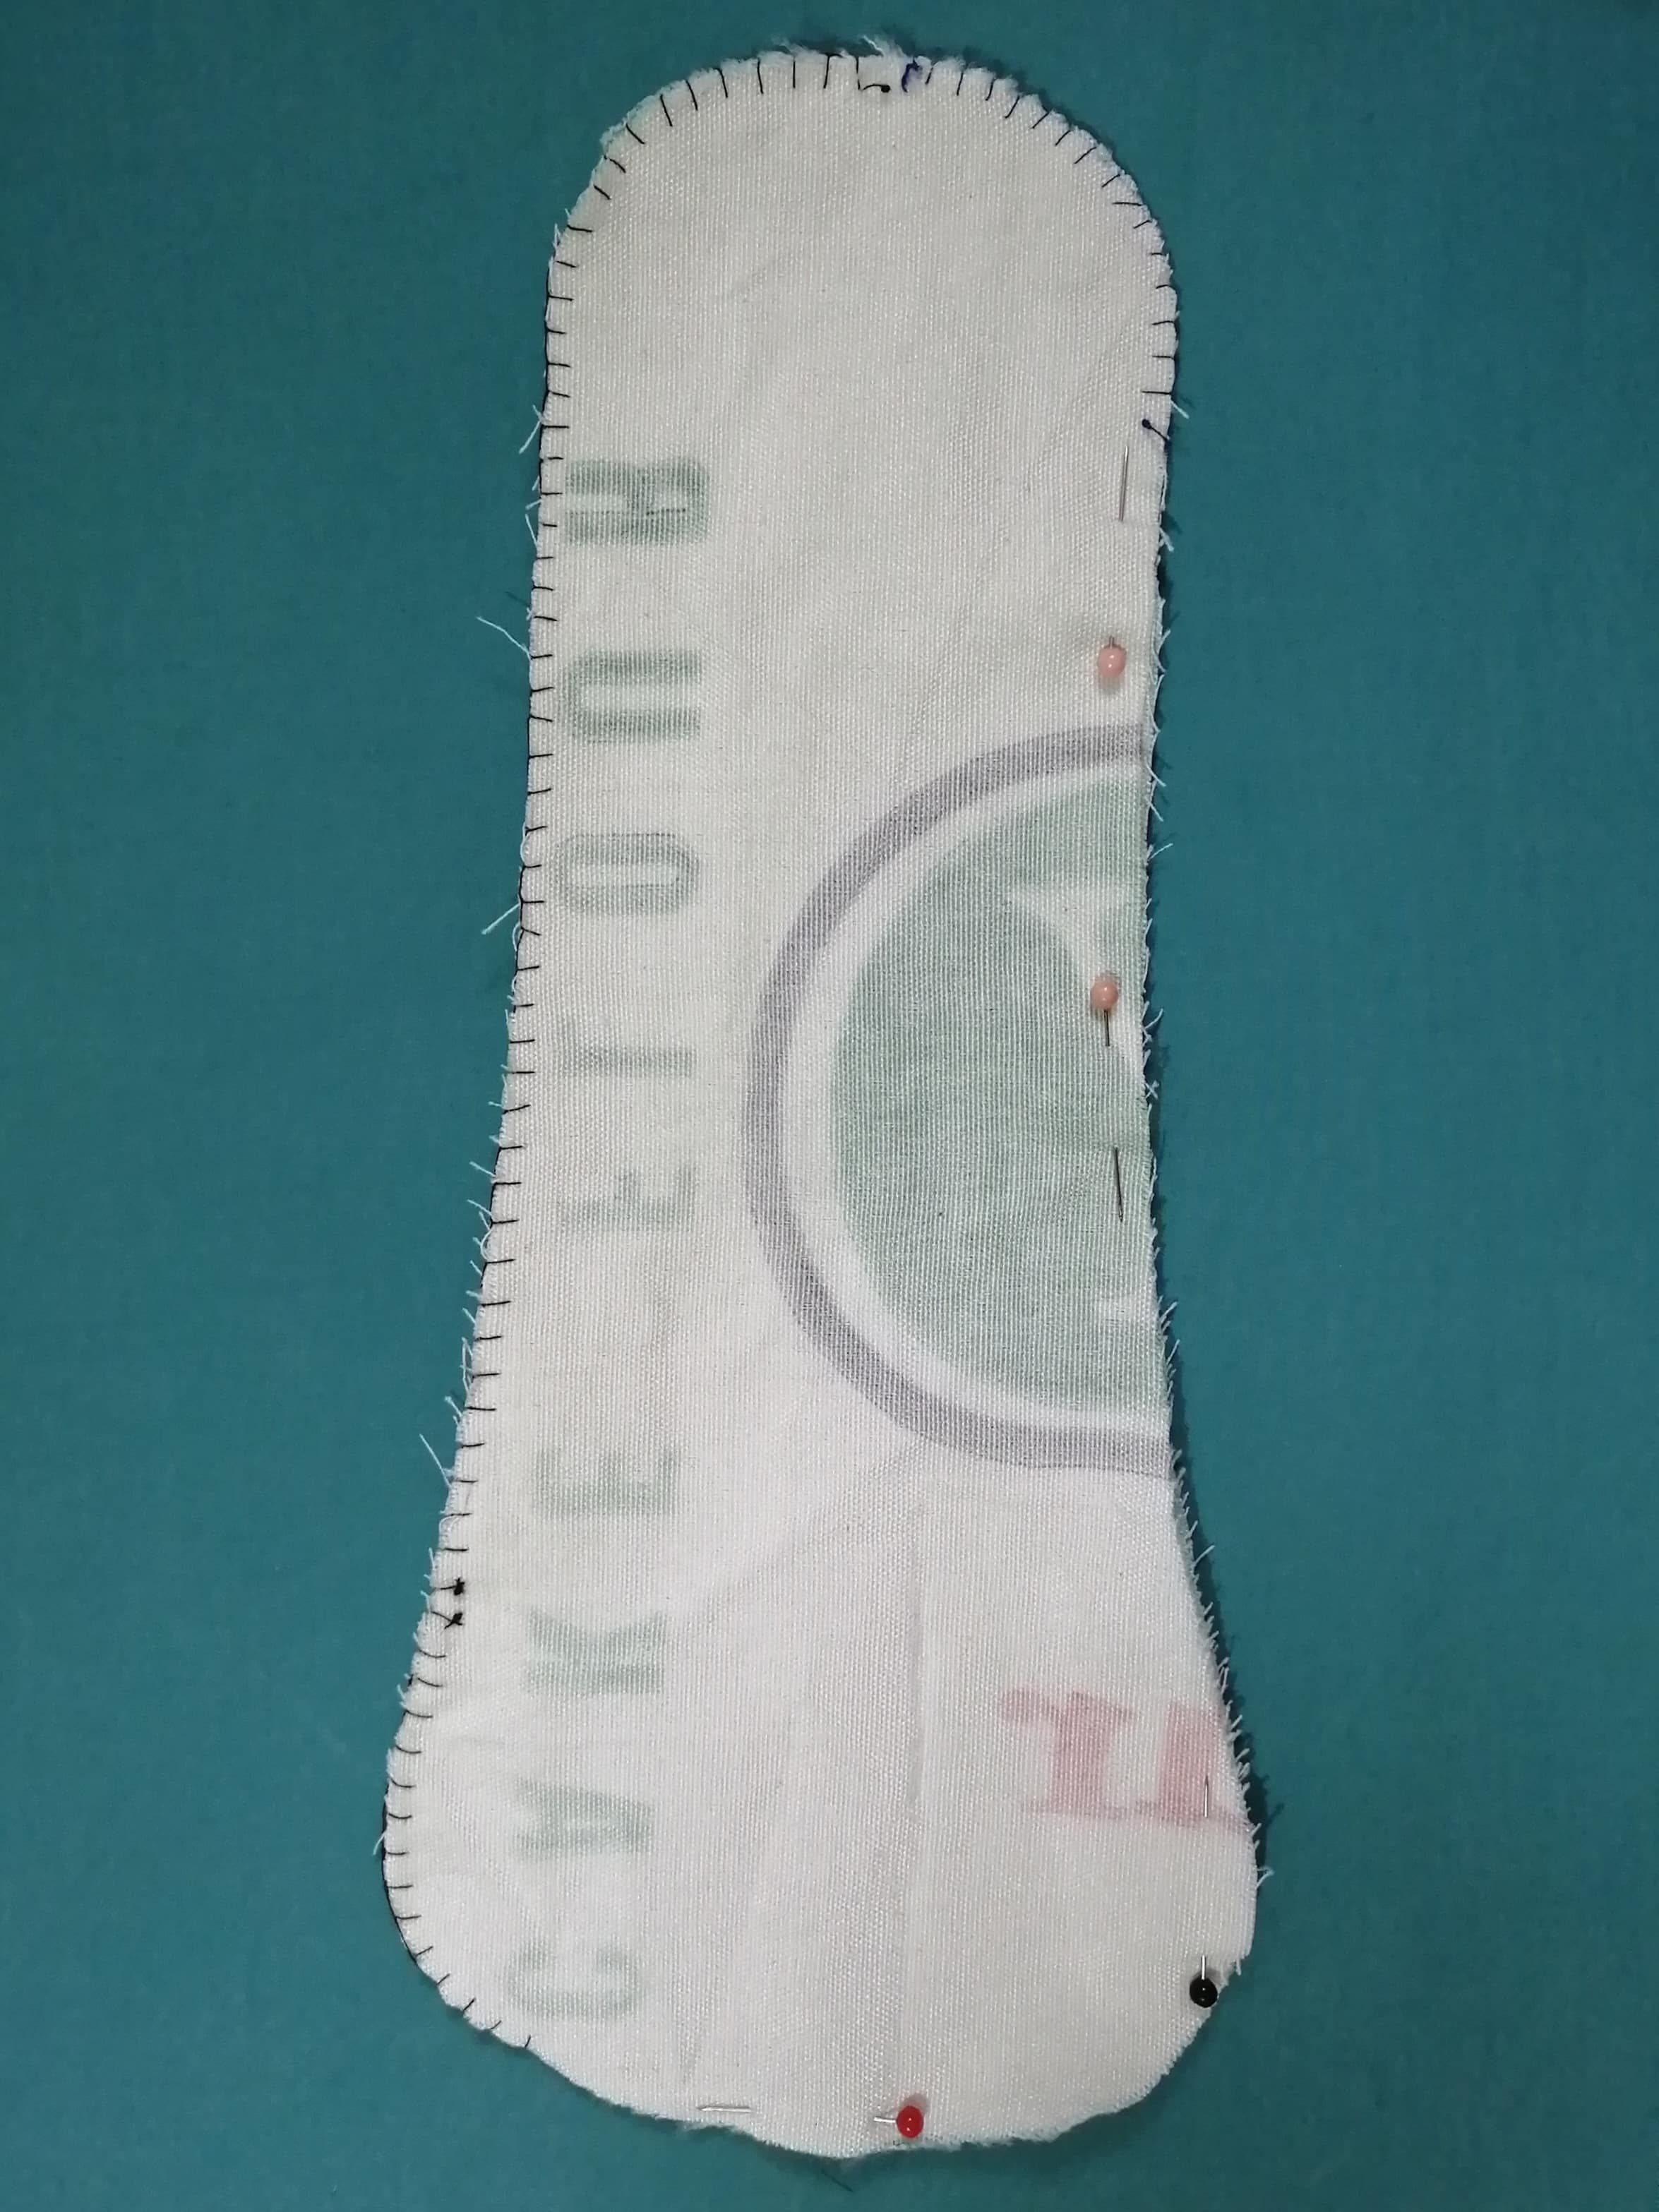
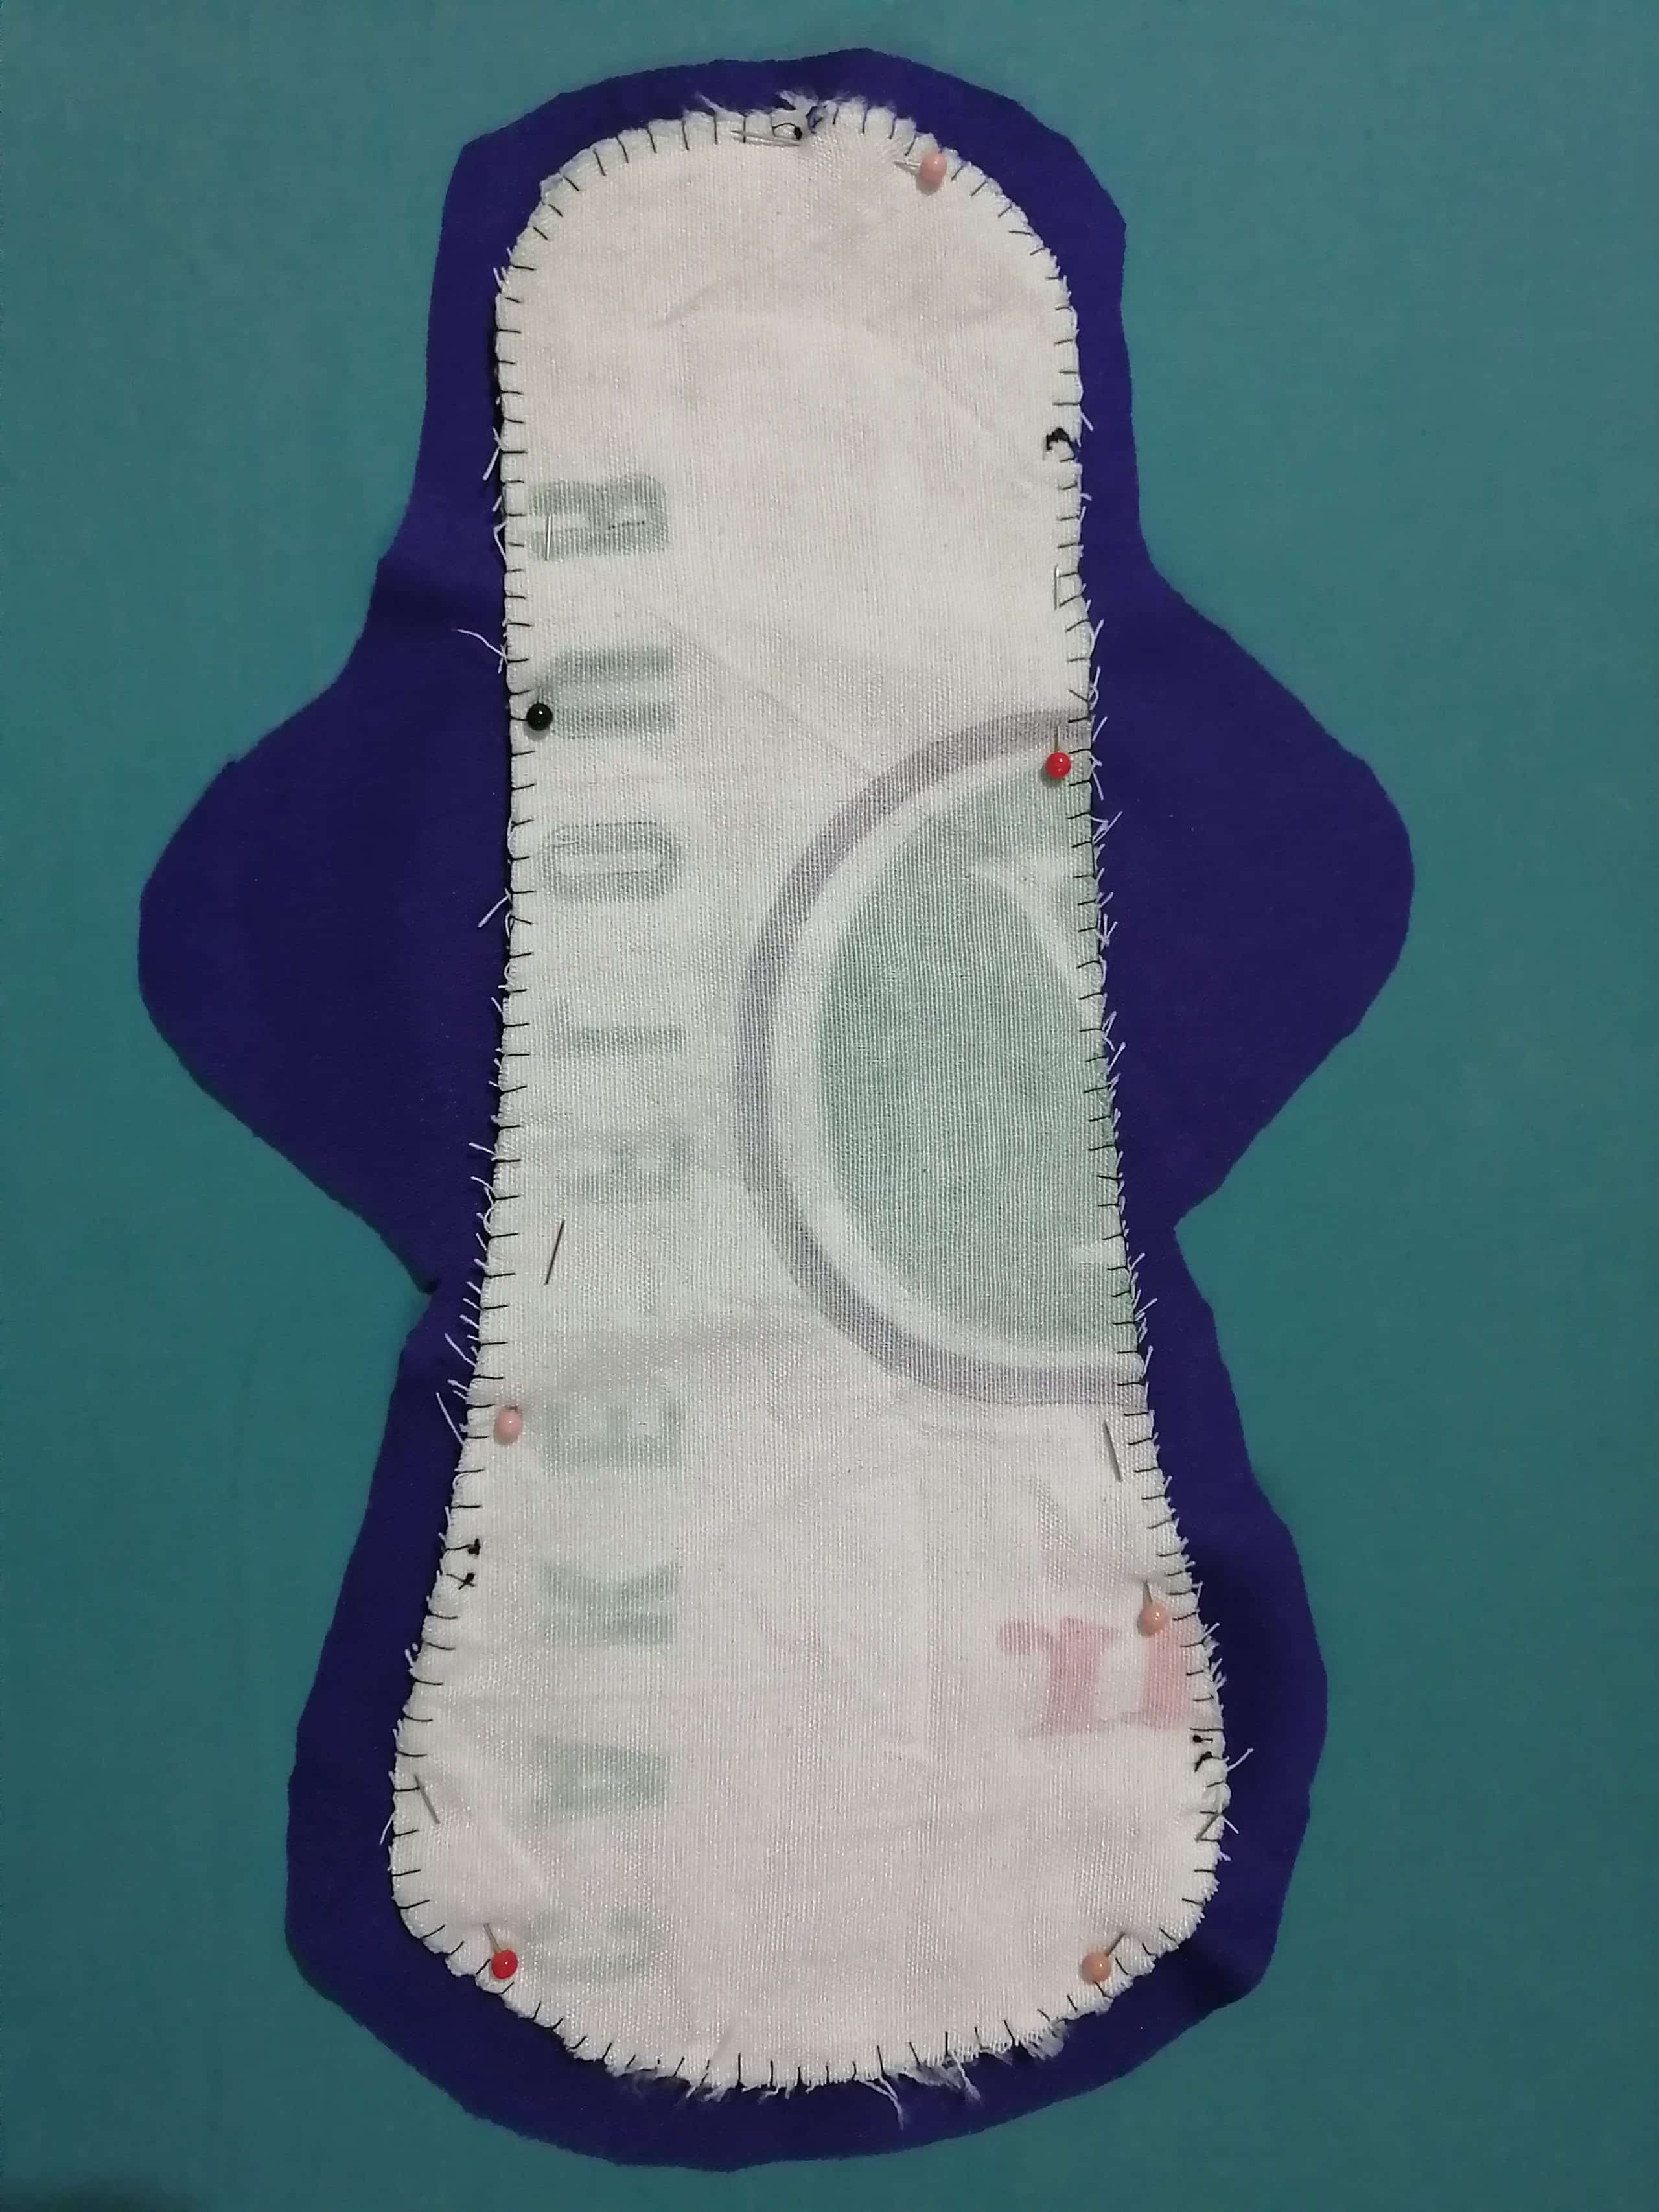
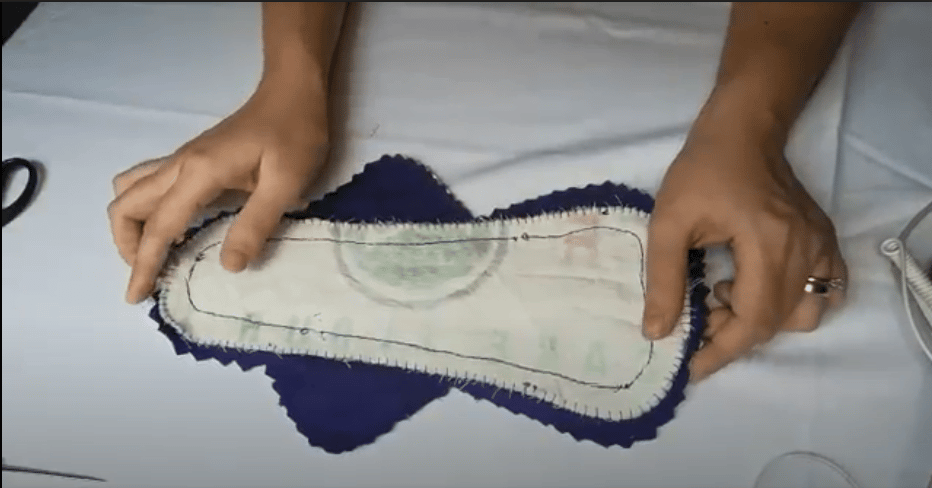
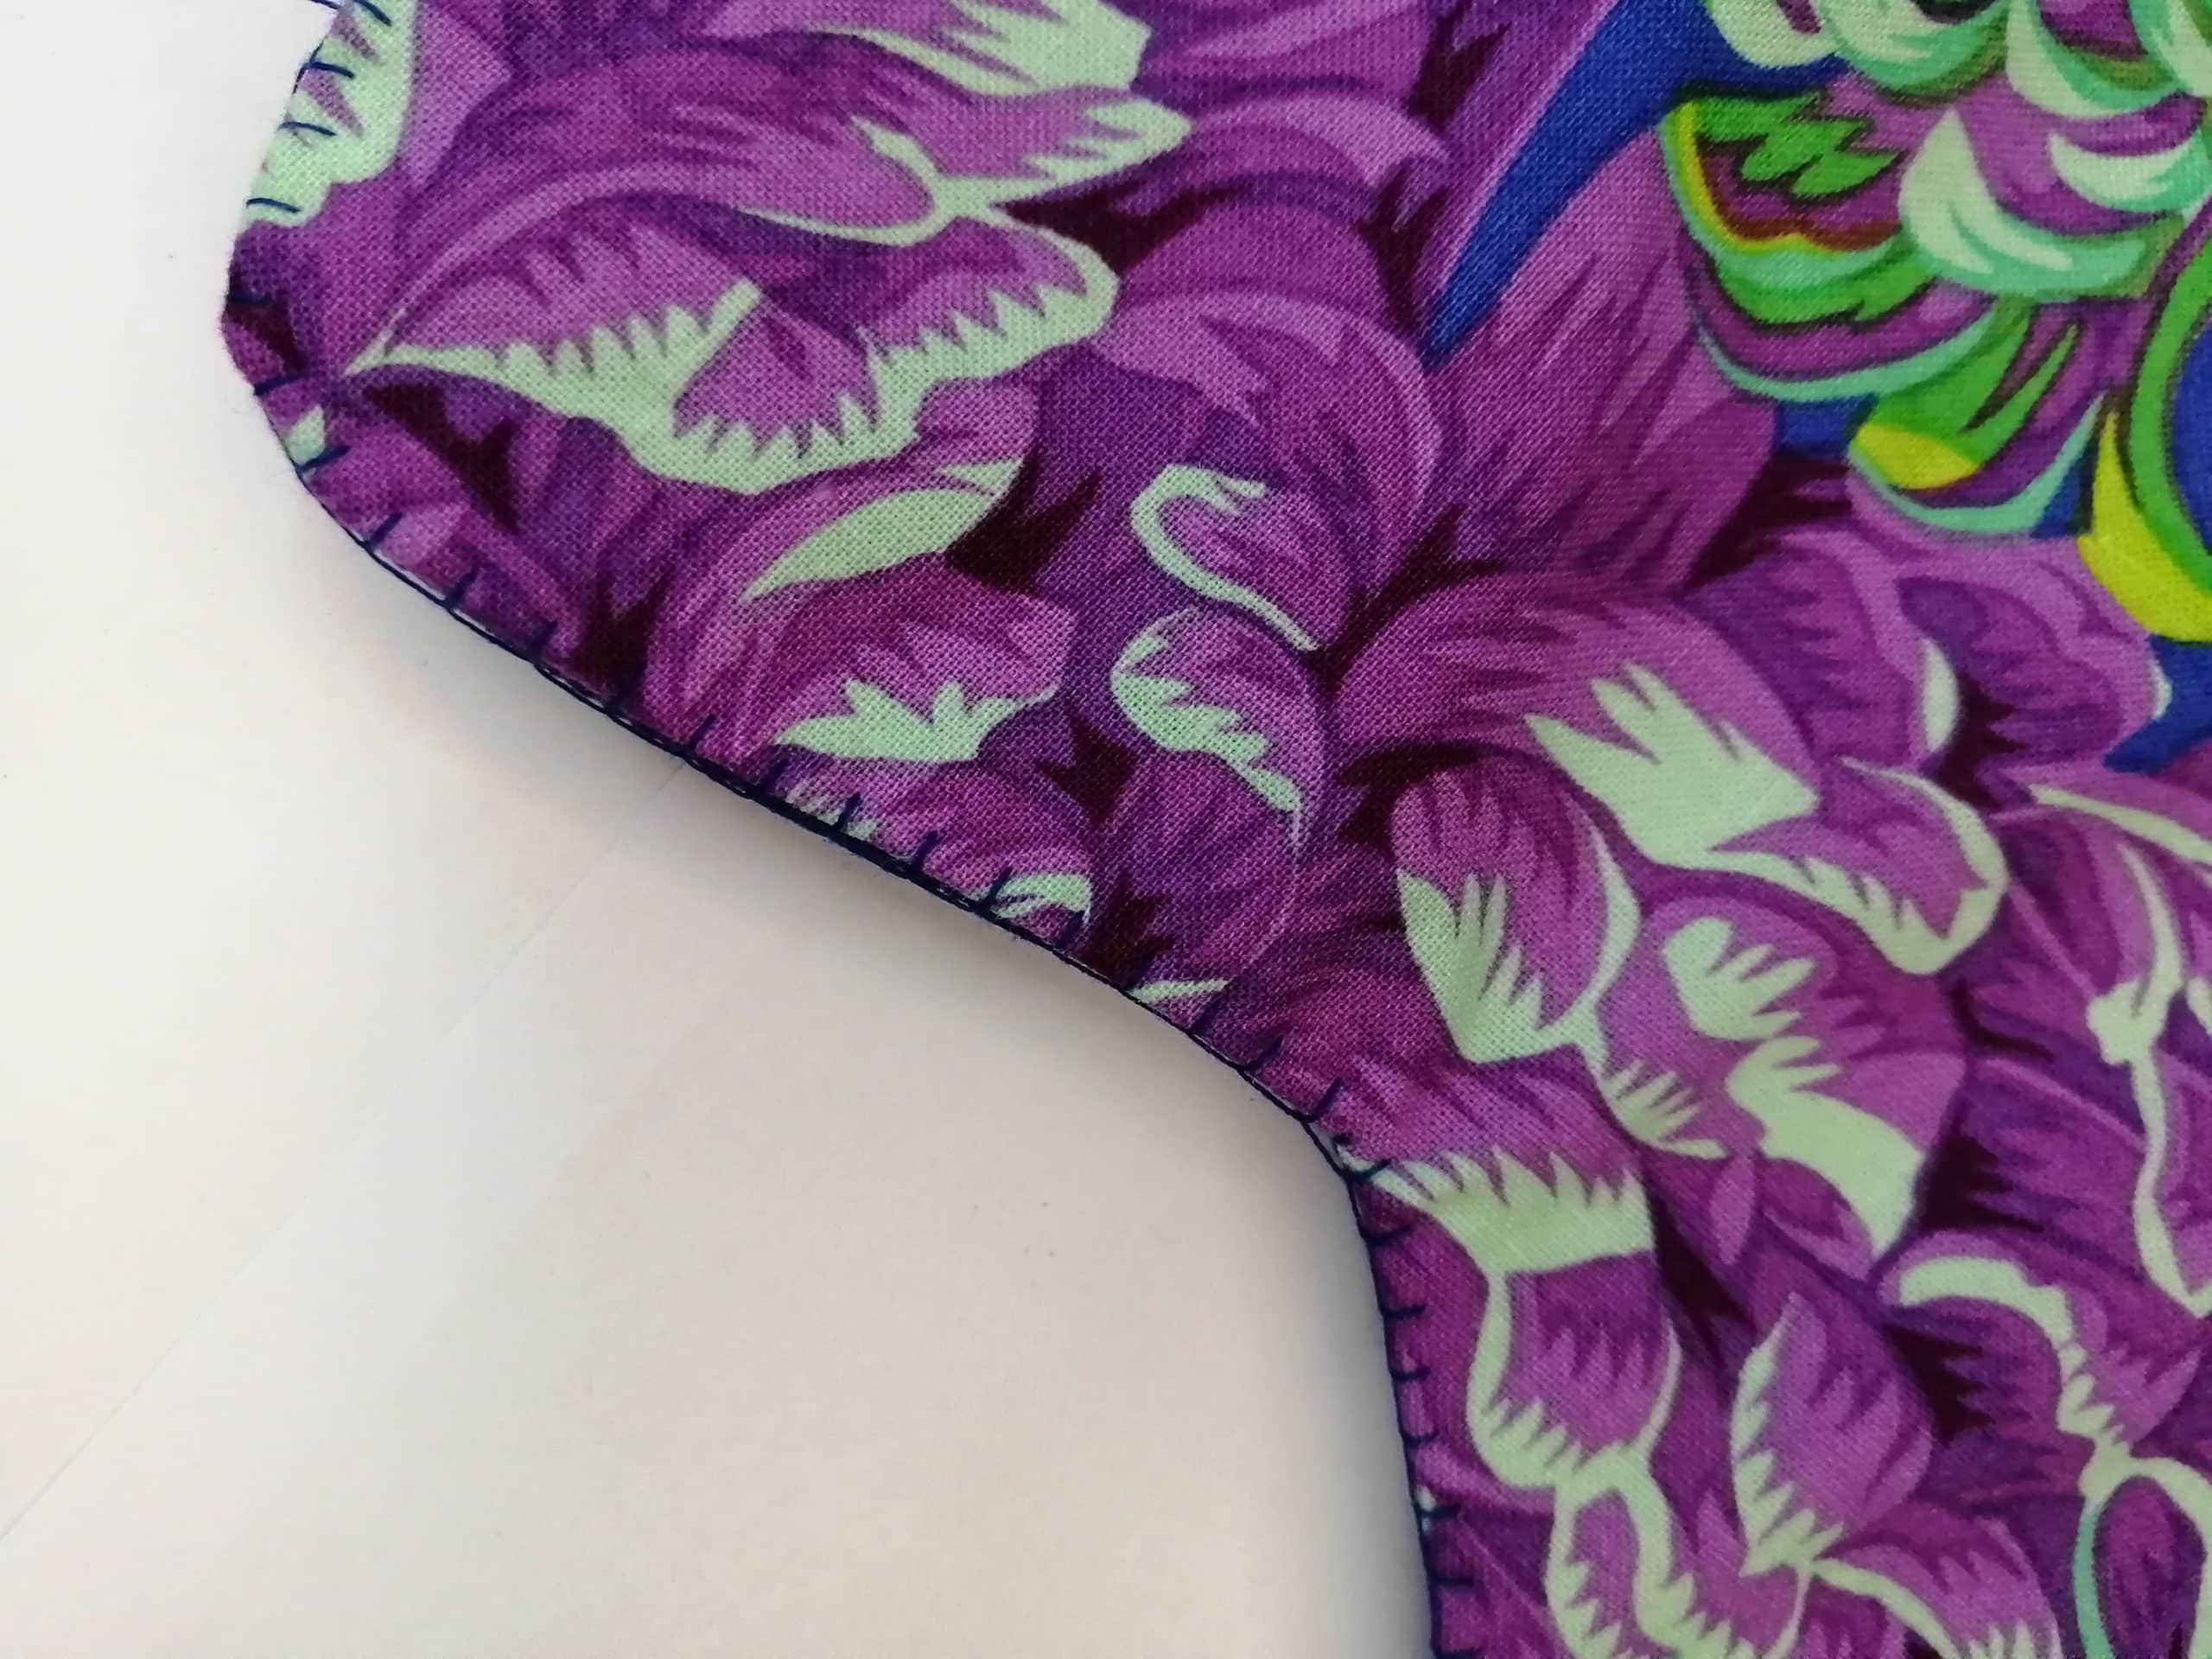
- Put the soaker layers together, secure the edges with pins, and then sew them together. You can use a simple running stitch or backstitch for this but I prefer to use a blanket stitch. It looks neater.
- Secure the soaker to the underside of your topper. I use a backstitch for this just because it looks neater and is more secure but you can definitely do a simple running stitch for this as well. I suggest placing the stitches about 1 1/2 centimeters from the edge. Click on the images below to see each step.


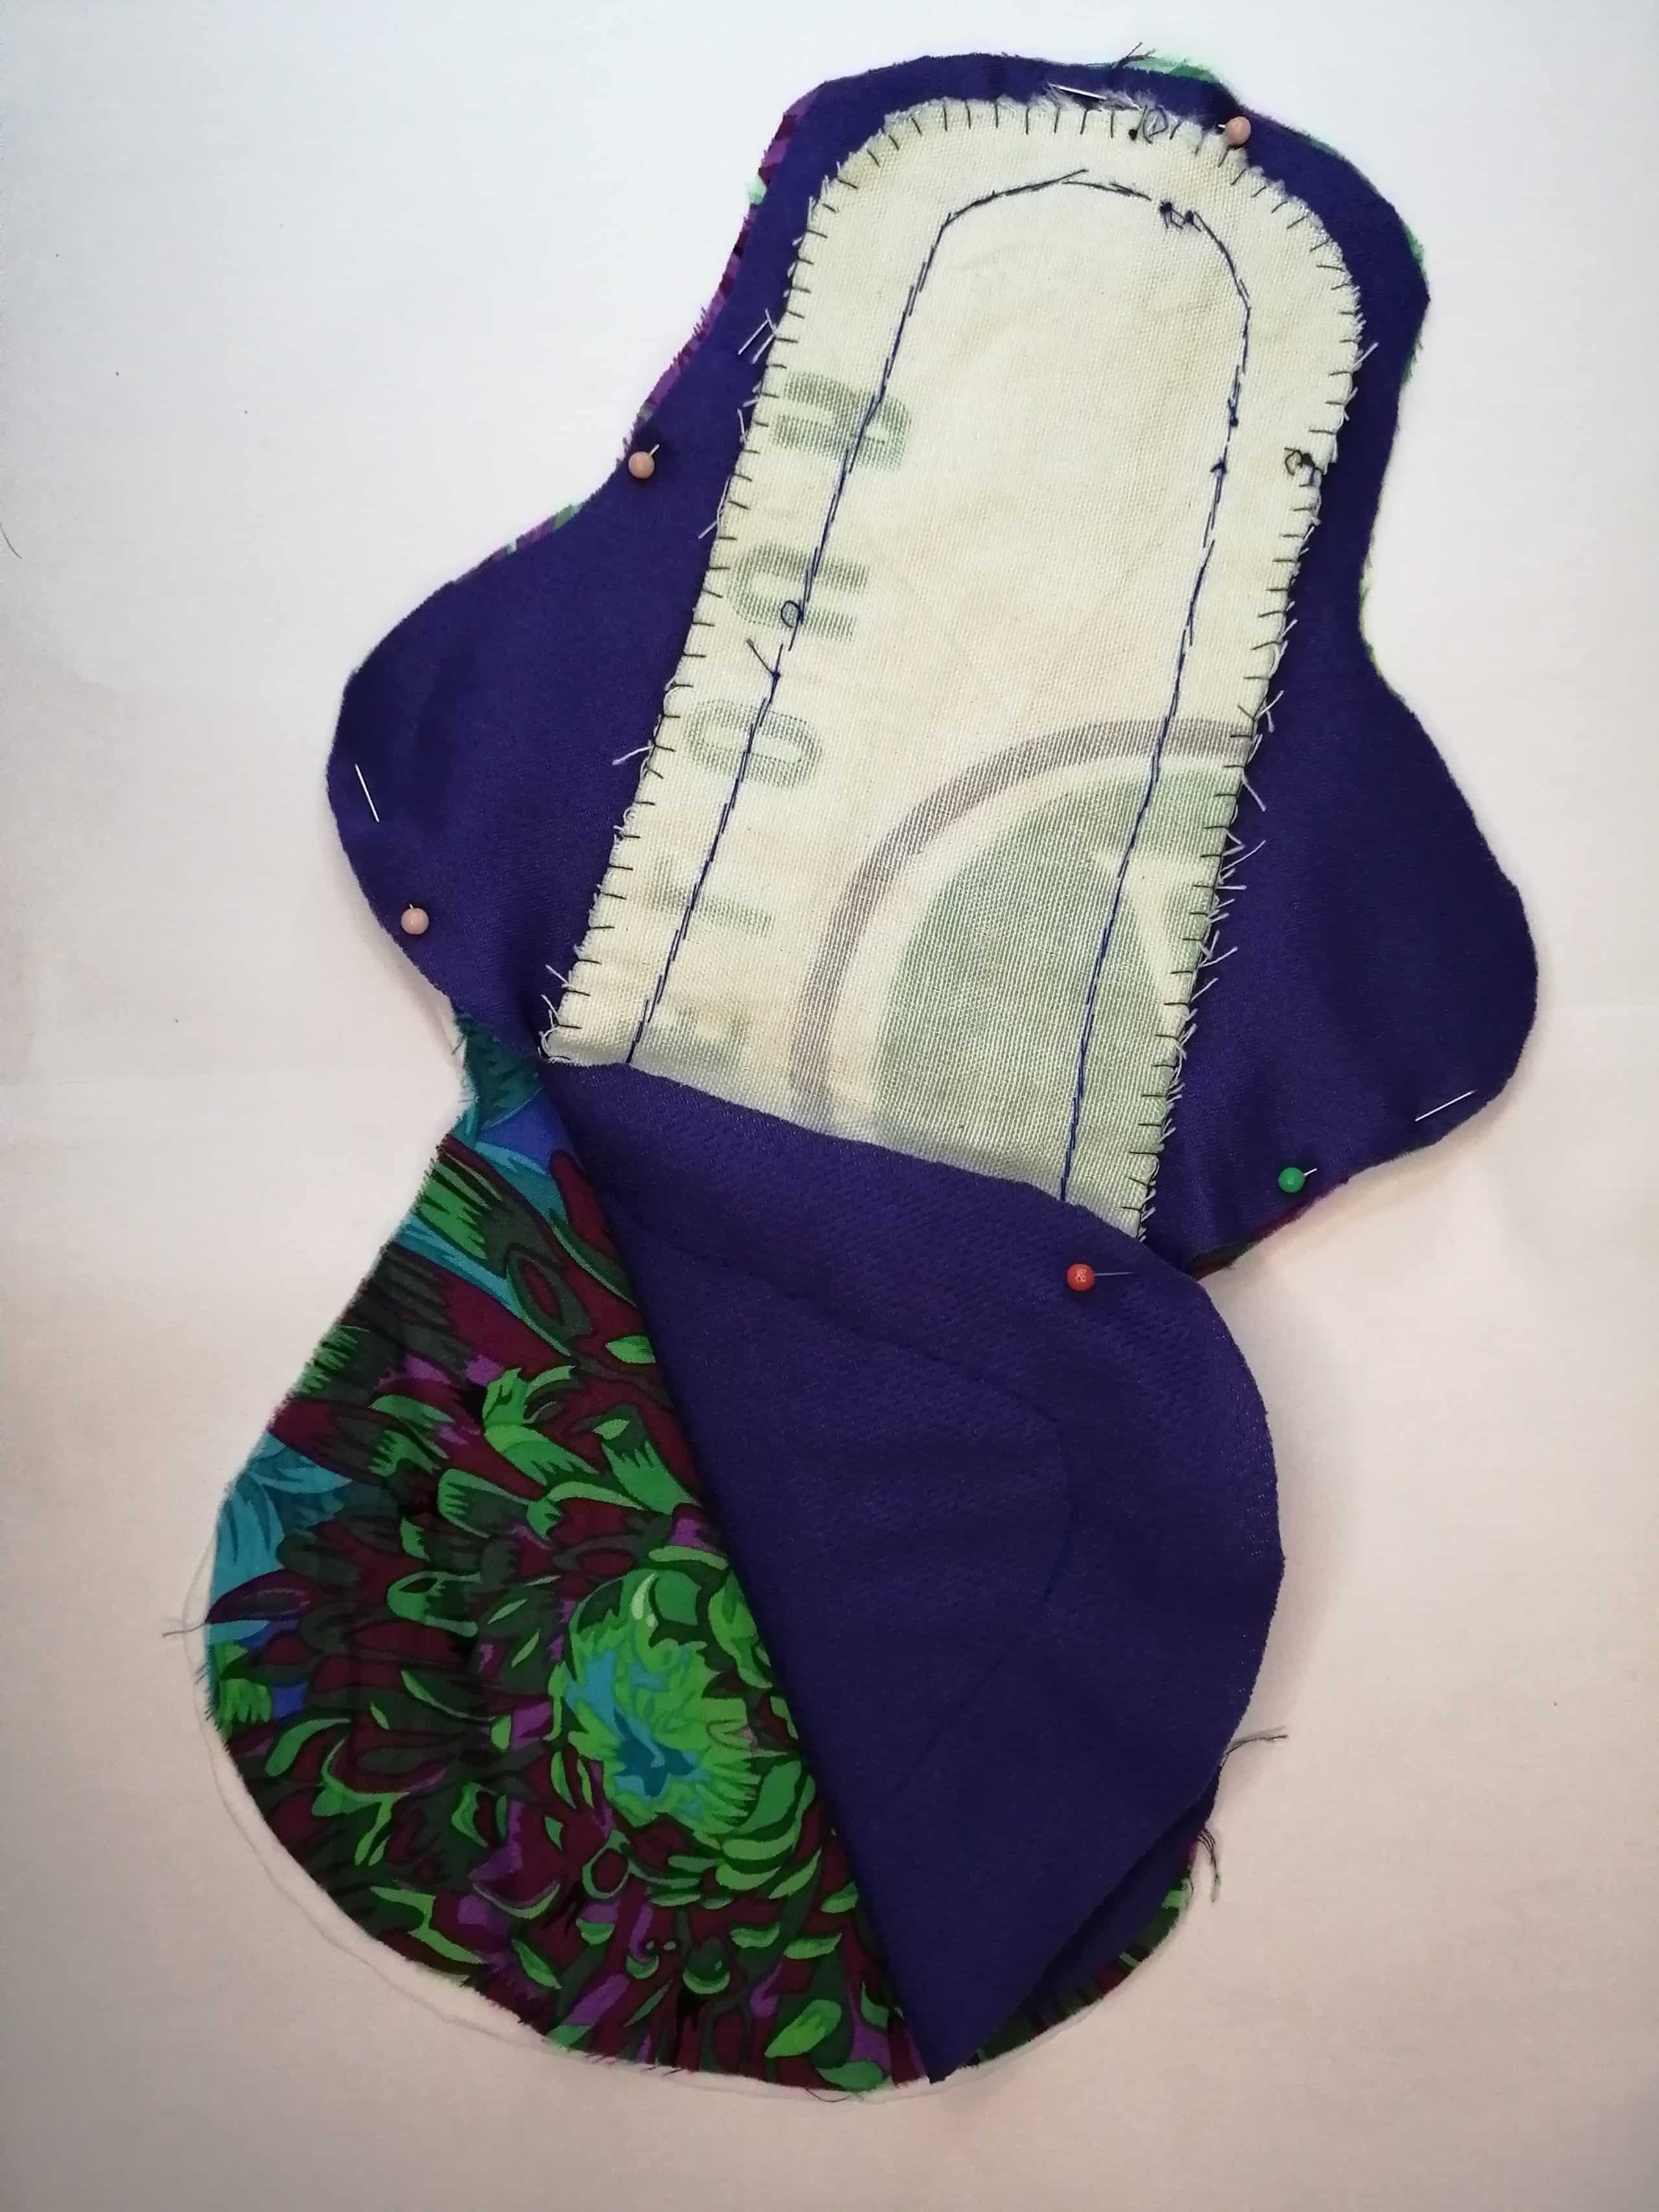
- This next part is where it gets a little tricky. You’re going to start attaching the PUL (or whatever waterproof layer you are using) and backer to the previous two layers. Keep in mind that when the pad is done, you’ll want the shiny side of the PUL facing up towards the topper and the printed/prettier side of the backer facing down towards where your underwear would be. Since we’ll be turning the pad inside out at the end of this step, you have to pin the layers so that the patterned/printed side of the backer is facing the topper, followed by the non-laminated side of the PUL. (This may sound a little confusing so check out the video to get a clearer picture of what I mean. Link at at the end of the article.)
- Secure with pins. If your topper is rather stretchy like AWJ, you’ll want to use more pins since it has a tendency to move around or bunch up more.
- Start your stitches in a straighter portion somewhere in the middle of the pattern rather than on a curve. That will make turning the pad out and closing the gap a lot easier.
- Run backstitches around the soaker, a few millimeters from the soaker edge. When you get to the wing parts, sew along the edge of the wings. Stop and leave a gap about 1 1/2 inches from where you started. That will be your turn hole.
- Cut out triangle shapes from the edges of the fabric outside the stitches. This is so important because if you don’t do it, the edges of your pad will be all lumpy once you turn it out. I’ve forgotten to do this step before and I had to turn the pad inside out again to fix it. What a hassle! Also, make sure that you don’t accidentally snip the stitches, otherwise your pad will come apart after several washes.


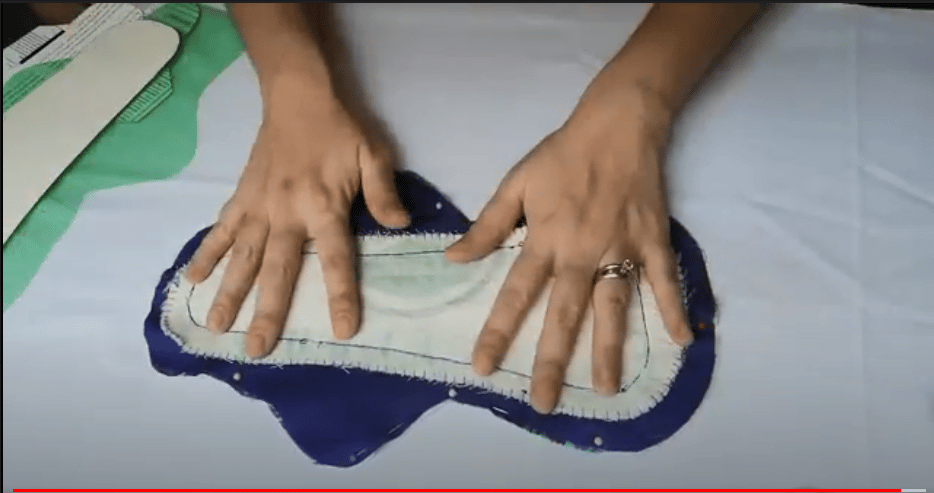
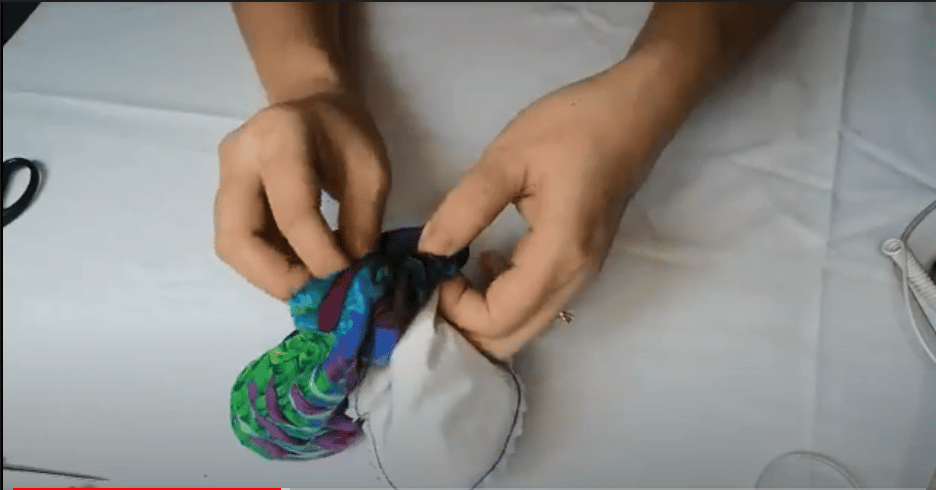
- Turn the pad out carefully through the turn hole.
- Stick something like a pencil (eraser side) or chopstick into the turn hole and push the edges out.
- Some pad makers would go over the pad with a hot iron at this point just to flatten it out, but I don’t usually do that.
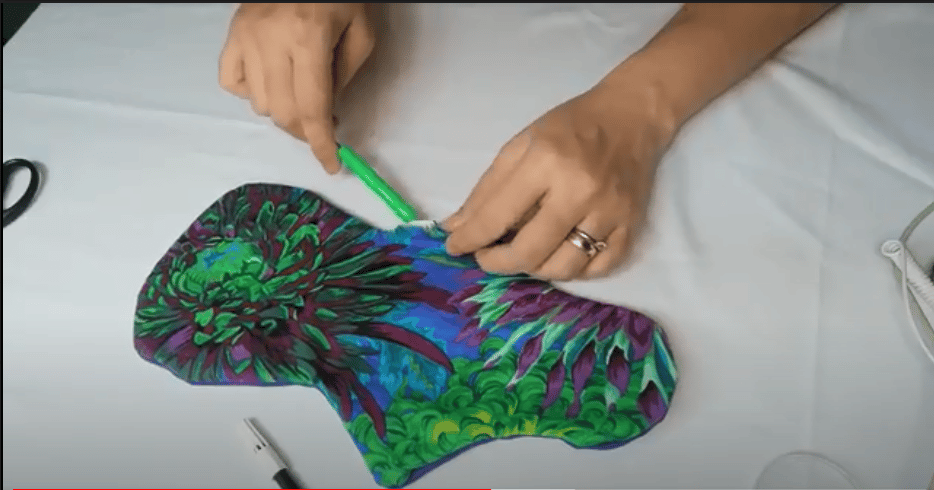
- Close off the turnhole. I use a blanket stitch for this and run the stitches all around the entire pad to flatten and secure the edges.
- Apply your closure mechanism of choice. Since I already have snaps and snap pliers, I’m going with those. Snaps are just a lot easier to close.


AND YOU’RE DONE!
Oh, I almost forgot… Make sure you wash all your fabric a couple of times before cutting out your patterns. This way, your pads don’t get all wonky if some of the fabric shrinks in the wash. Prewashing also increases the absorbency of pads. It’s supposed to “prime” them somehow. Don’t ask me how because I just learned that from other more experienced pad makers and I took their word for it. I’m no expert.
Making cloth pads by hand does take a lot of time but that’s why I tend to do this while I’m watching videos on Netflix or Youtube.
I hope this was helpful for you and that it will encourage more women to make the switch to reusable menstrual products. It truly is the better option both for yourselves and for the environment.
If you’d rather learn the steps through video then check it out below.
______________________________________________________________________________
Links to relevant Facebook groups and YouTube videos that might help those of you who want to learn more about cloth pads:
- Amy Nix pad making tutorials
- Sewing Cloth Menstrual Pads Facebook group
- Reliable suppliers for materials
- FB: Fabrix Unlimited
- Shoppee: fabriholic and allabout fabrics


Comments